Yes, I know, it's been a while since I posted something crafty. But I promise to make up for it - really I do.
For now, here's a super easy (and relatively painless) piece of artwork for Valentine's Day.
I had been thinking about how to decorate the house for V-Day for a while. Partly because we have like two things for Valentine's Day (excluding all the wonderful printables - love me some free art), and partly because I hadn't really done anything vaguely crafty since Christmas. It was well overdue.
So, 'trolling' around on Pinterest, as you do, I came across this cute little piece that was posted from Mod Podge Rocks guest blogger, Anna, from My Life and Kids, who did this great 'DIY version' of a Potterybarn sign.
Now, I liked the idea, but there were a couple of things I wanted to change. I didn't want it that big - I just don't have the space to store it after V-Day and I wanted to 'jazz it up' (and let's be honest, I figured there had to be an easier way to do it than to print out letters, etc.).
I took a look at what I already had on hand, and what do you know? Inspiration struck!! (and it was going to be a free craft. Gotta love that).
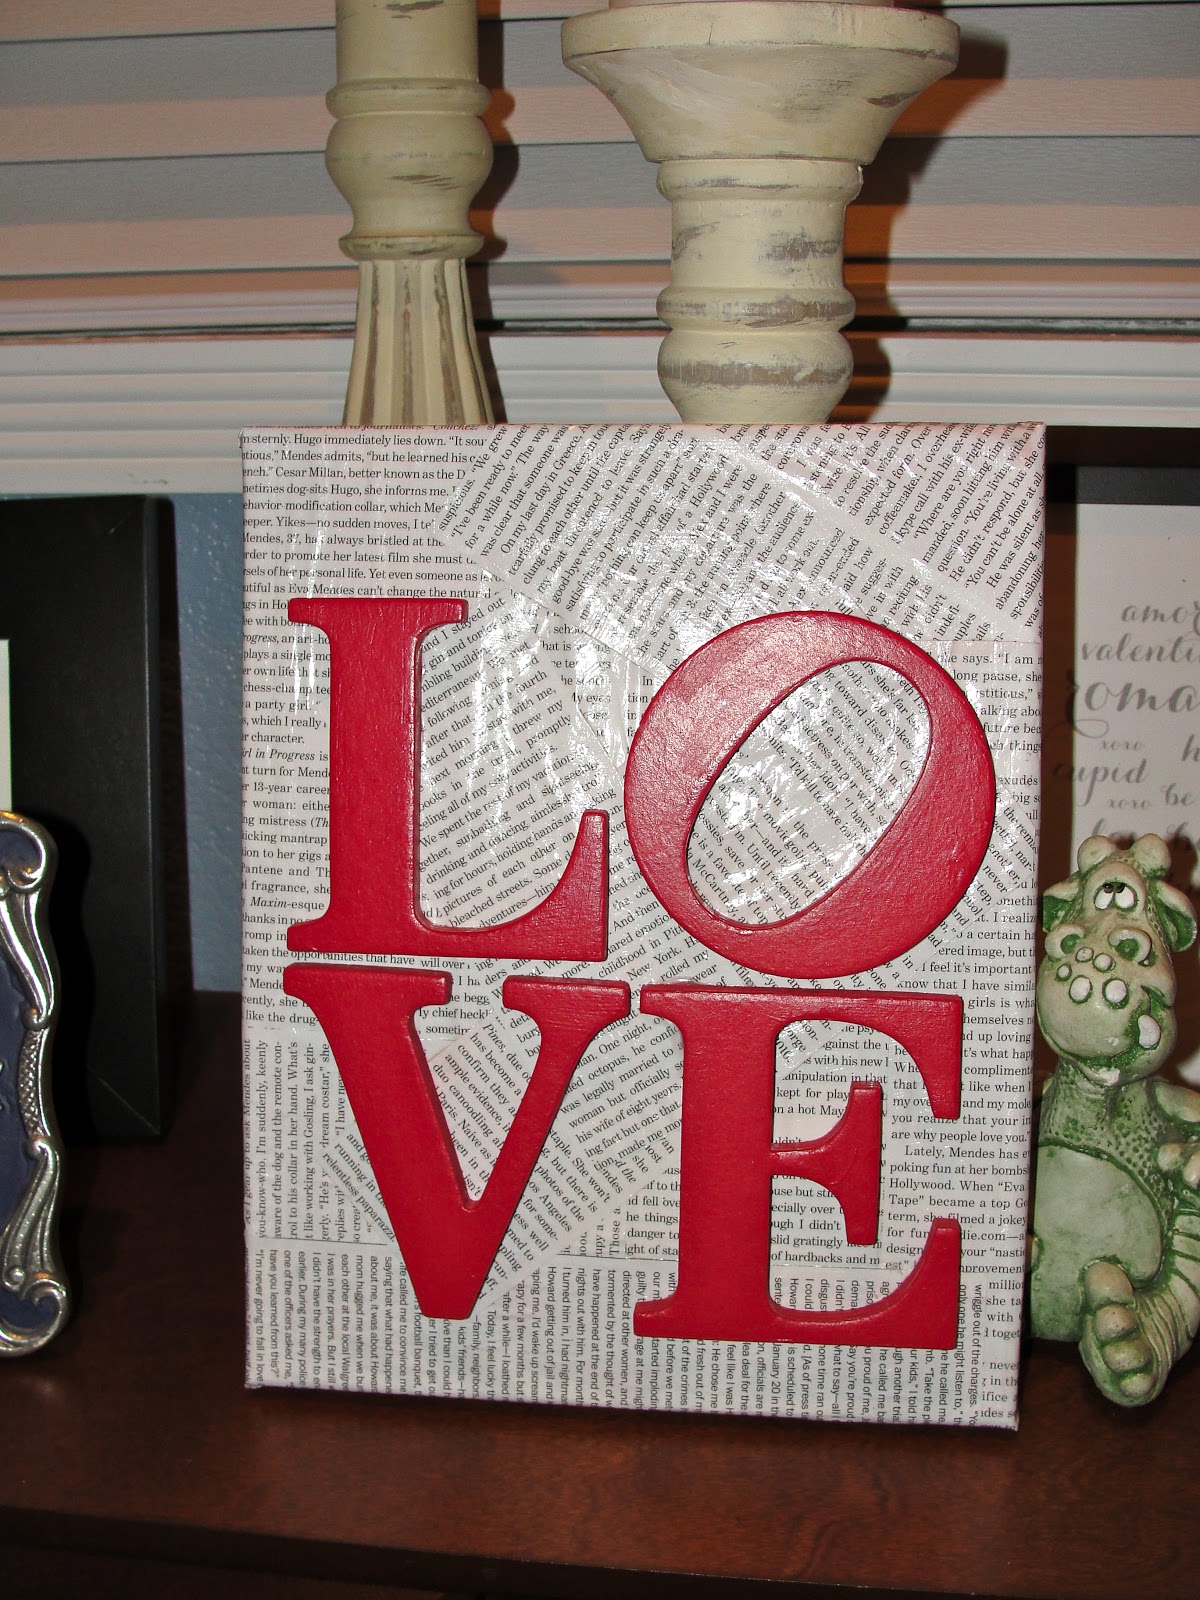
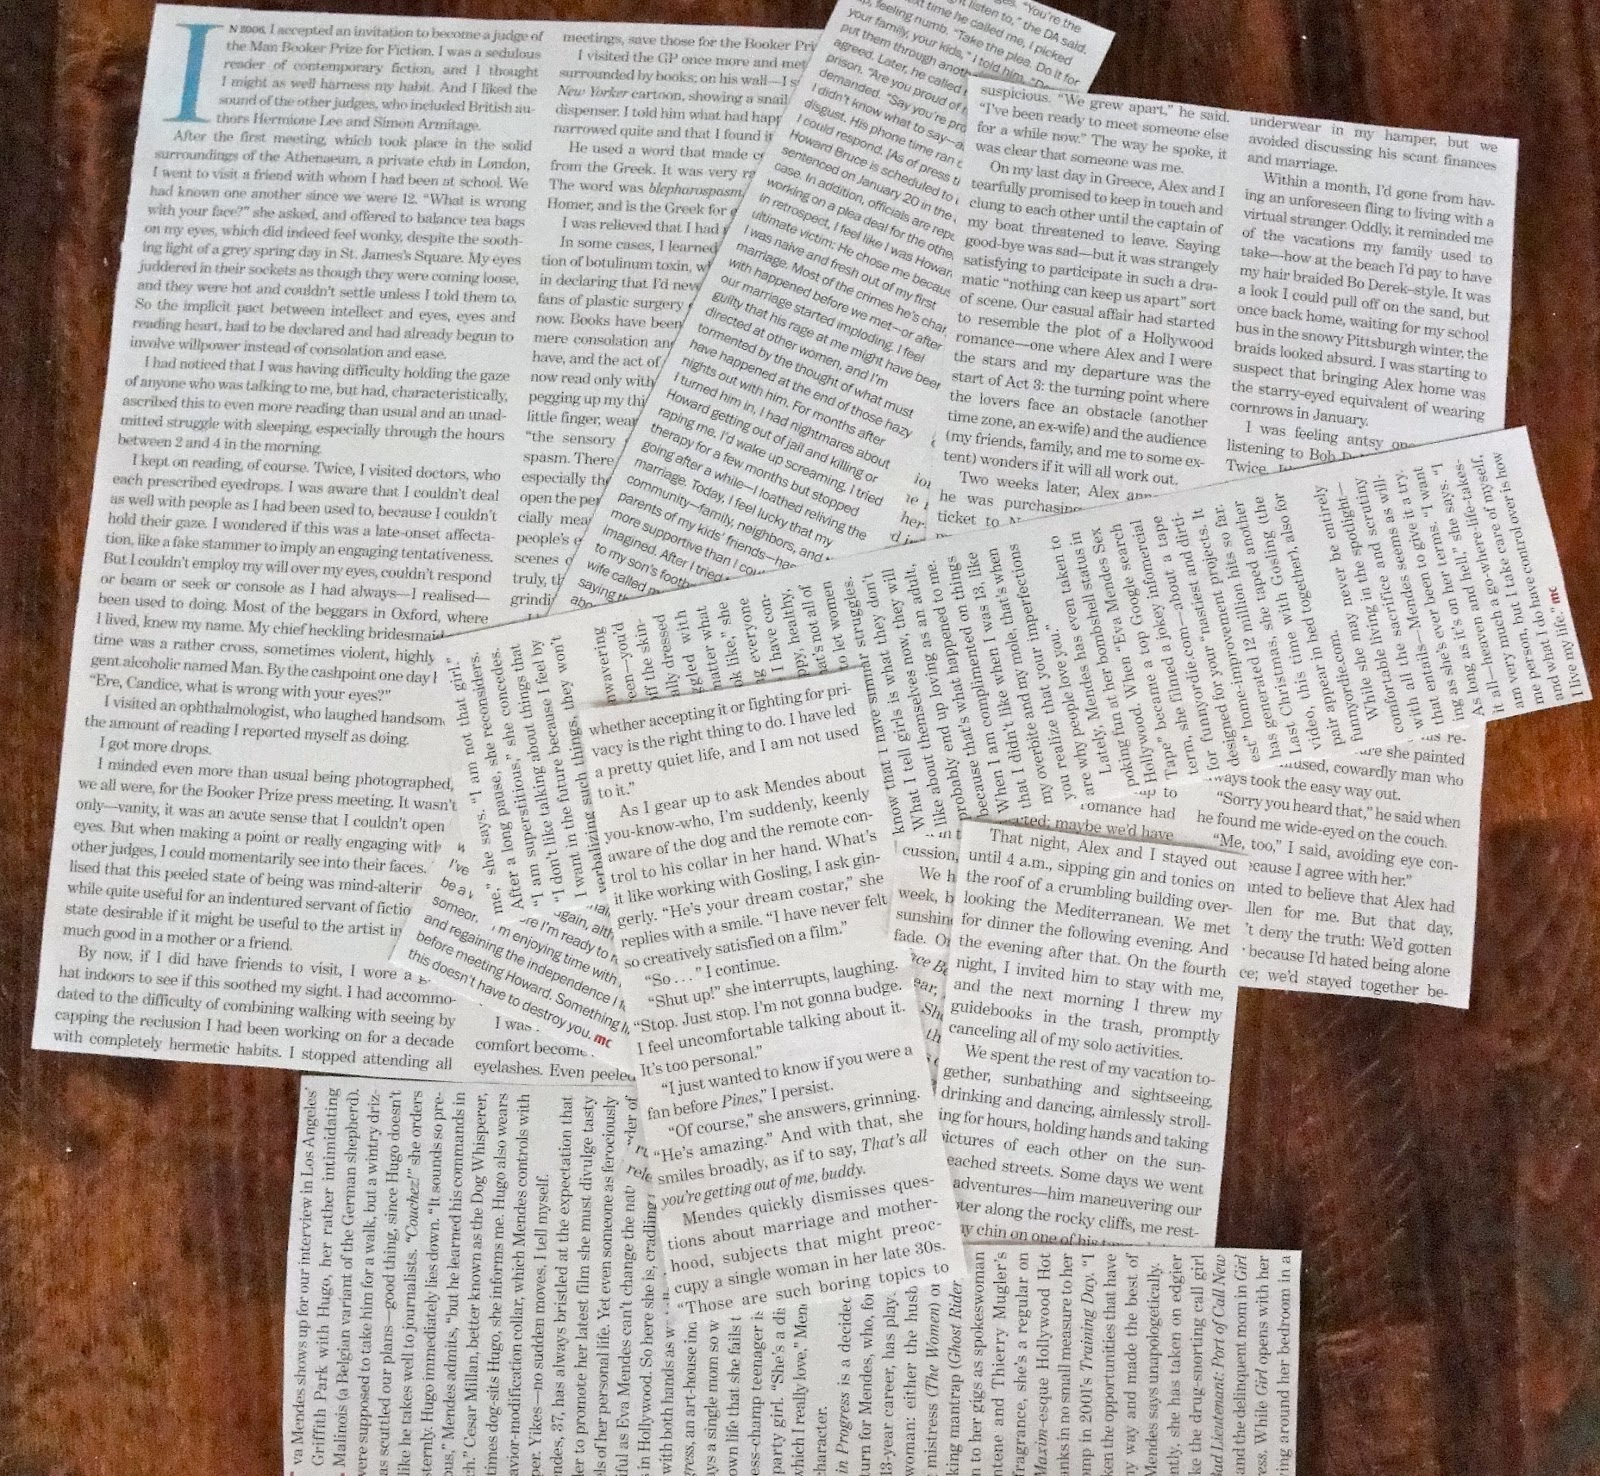
So, here's what I did. I grabbed one of my 8" x 10" canvas's, some pages from a magazine (side note - I wanted to use newspaper print, but it doesn't take well to Mod Podge and I really wasn't keen on getting covered in newspaper ink) that had just plain text on them, Mod Podge, a couple of brushes, chip board letters (left over from another project I did eons ago), handy dandy adhesive dots and red paint.

I painted the letters first (both sides, cause, as you know, I'm funny like that), and while they were drying, I cut the pages from the magazine so that they covered the whole canvas (including the sides) and had a few tries at working out how to lay them out.


As soon as I had all of them where I wanted them and they were sticking to the canvas nicely, I coated it all twice with Mod Podge (good 30 minute dry time between each coat). I did find that when I first put them on, the print and colors from the other side of the page started to show through, but once the Mod Podge dried, you couldn't see them, so don't freak out if this happens to you. Take a deep breath, walk away and grab a coffee (or glass of wine if it's 'that' time of the day).
When you are satisified that everything is dry, work out how you want to place your letters, whack the sticky dots on the back of the letters and then add to the canvas making sure to press nice and hard (I used a paper back book under the canvas to provide support). Give it a few minutes to make sure the adhesive has done it's job and then 'voila!', easy V-Day art.

See, told you it was a piece of cake.
(And because I can't stop once I start, while I was waiting for everything to dry, I put together these fun little Valentine's for Little P to give to her classmates - thanks to Simply Modern Mom for the inspiration {and the free printable})
 |
| Cute, huh? |
So, did I 'nail it?'
K
No comments:
Post a Comment